It’s very interesting that you can actually boot Android on your machine just like any other OS. No kidding, as Android is kind of an another Linux Distro. Is it? No not really, it is based on Linux kernel but it cannot be called as a Linux distribution. Anyways, this is not our topic of blogpost right now, if you want more information on it, look at this Quora question and their answers.
Coming to our topic of interest, one need to have VMware Fusion or a Virtual Box installed on your Mac to install and run Android. We are not going to deal with the Virtual Box this time, it would be a good standalone post for future. So, if you don’t have VMware Fusion, download and install it by going here. It is paid, if you are a student, you can get it for free. If not, you have to purchase it or you can try the trial version or maybe you could torrent it, haha. No, please don’t do that. Who am I kidding, LOL.
Once you got it on your machine. I would like you to visit this amazing site called as android-x86.org, where you can download any version of Android iso images. Hats off for their amazing effort. Very recently, they even added the Android 5.1 too. I haven’t tested that one yet, but I tried playing around with the other latest versions.
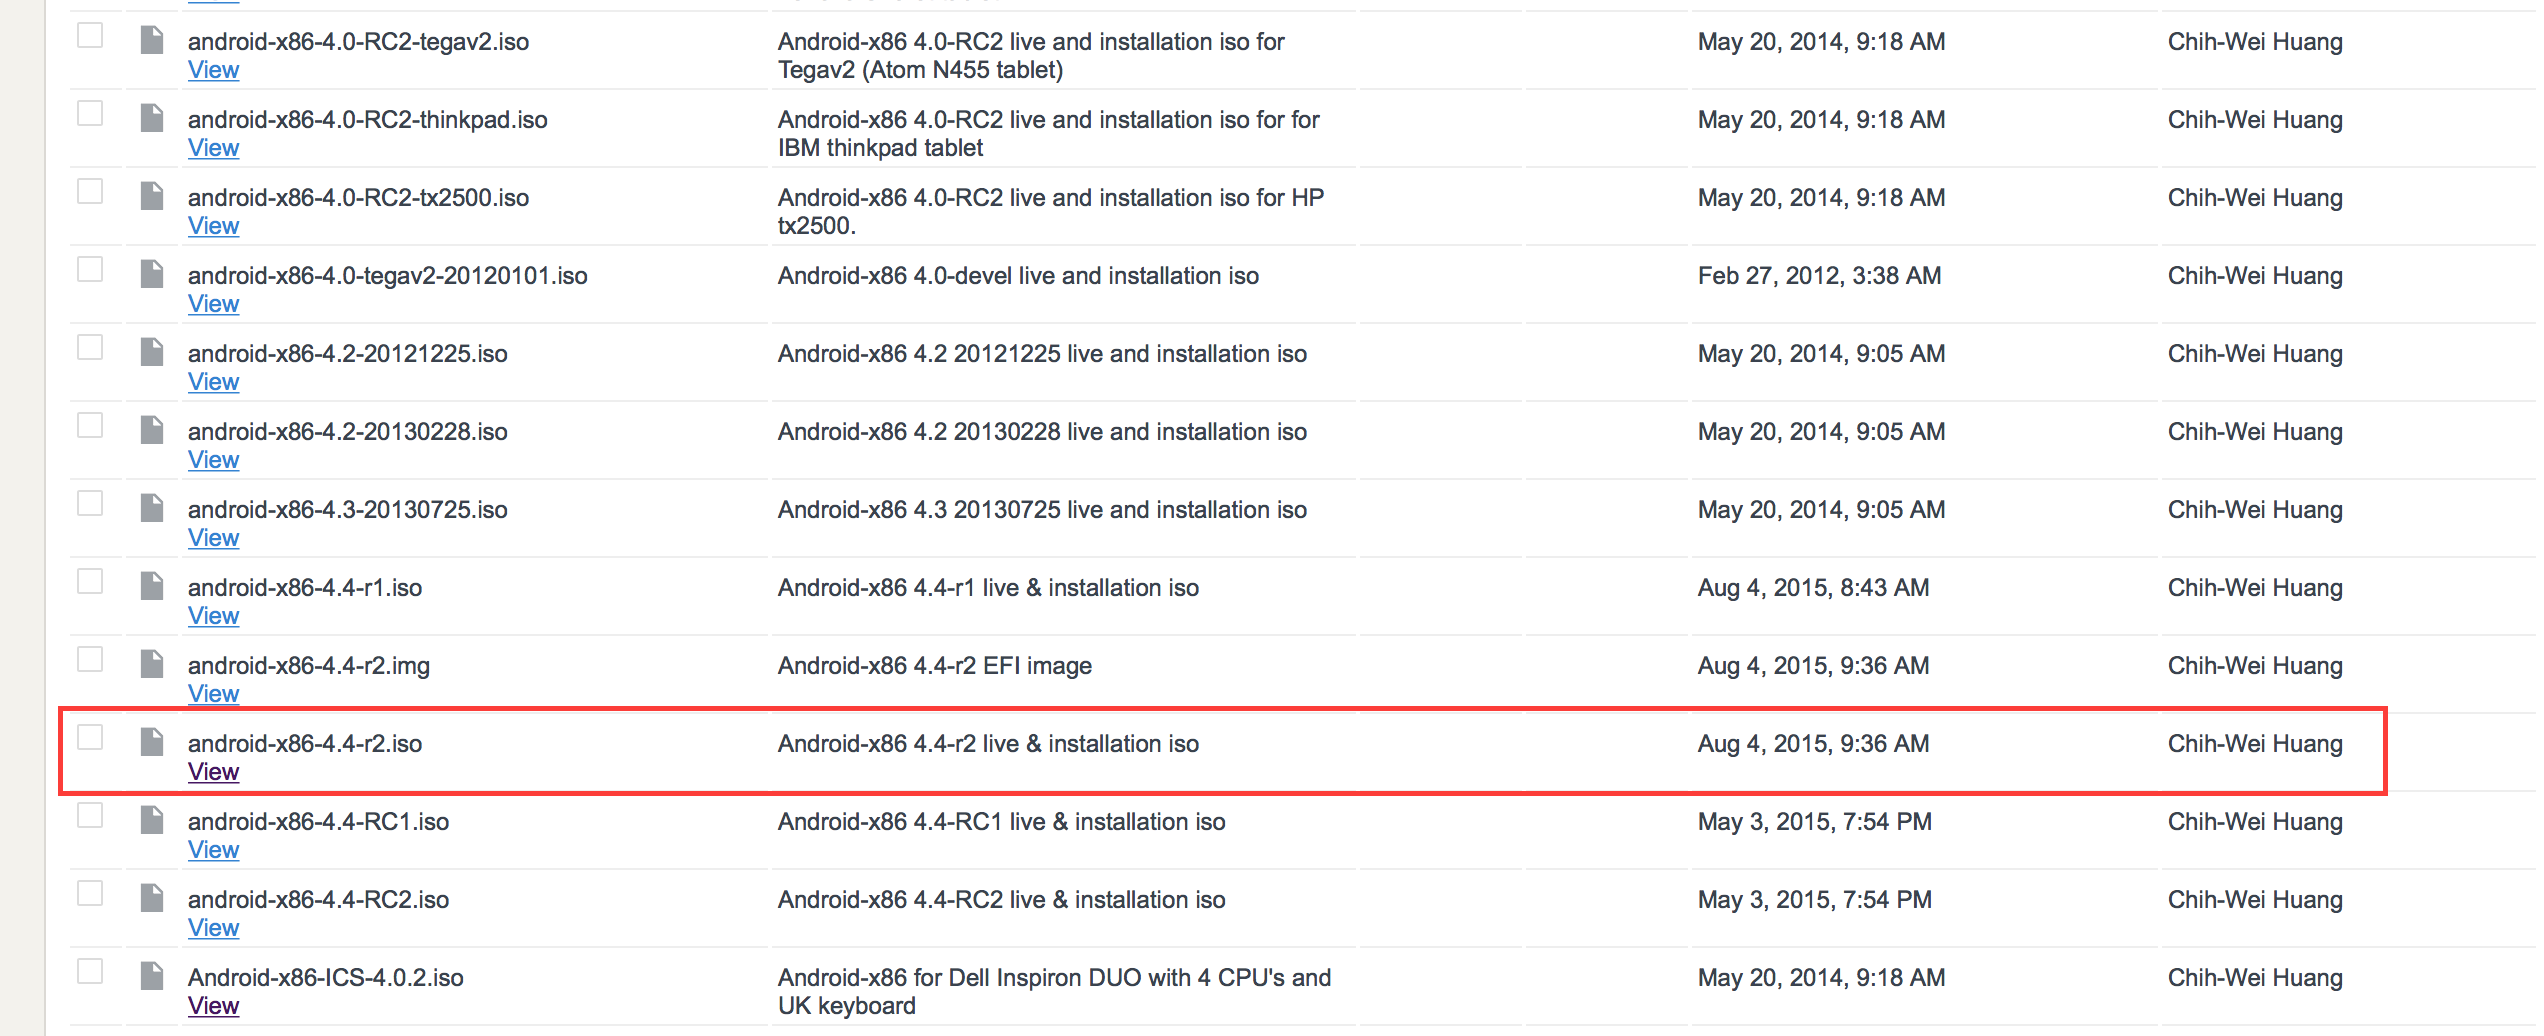
Click on the Download page from the side menu, and you can download any of those images from the list. In this post, I am going to show the installation of android-x864.4-r2.iso.

Download the image from the highlighted link as shown in the above picture.
Now, fire up the VMware Fusion on your machine,
Step 1: Click on the “+” button and select New from the drop down menu.

Step 2: Select the Installation Method as “Install from disc or image” and hit continue

Step 3: Now, click on the “Use another disc or disc image button” and choose the downloaded android iso file.

Step 4: After choosing the image, it should show up in the screen like the following: Hit Continue.

Step 5: You should see the following screen:

Step 6: Click on the “Customize Settings” button and Save the Virtual Machine image to any desired location on your machine:

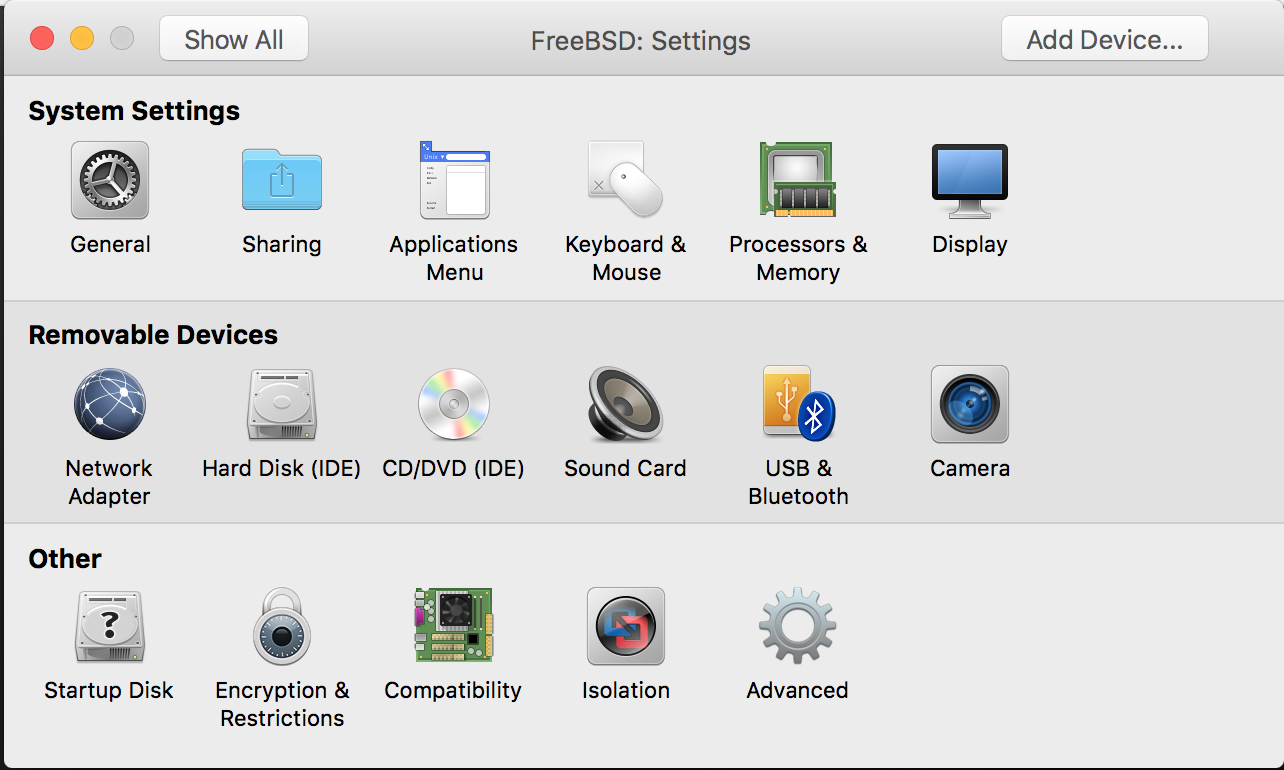
Step 7: Once you save it, there will be two screens which will pop up, a black screen with a play button, and the other with settings:


Step 8: On, the settings screen, select Hard Disk and set it to how much space you wanna allocate: [I chose the default 20 GB space]

Step 9: Select the processors and memory. It will allow you to allocate the RAM for the OS. I gave something above 4 GB, you can set it to 1 or 2 or 3 based on your RAM.

Step 10: After setting the memory, close the window and click on the huge play button on the black screen. That should show you the following screen:

Step 11: Select the last option – “Installation – Install Android-x86 to harddisk” from the boot menu and hit enter.

Step 12: Now, we have to create a partition. You might see only two options. Don’t worry about it. Choose the “Create/Modify Partition“.

Step 13: We don’t want any GUID Partition Table. So, select the default choice which is “NO” and move on.

Step 14: Now, choose the “New” from the bottom menu. You can navigate through those options by using right and left keyboard keys. Press Enter.

Step 15: Select “Primary” and hit enter.

Step 16: Now, you will see the size of the primary partition as 21,467.68 as I have selected 20 GB at the start of our installation. If you have chosen different size, the value would be different. Just hit enter and proceed.

Step 17: Now, choose the “Bootable” which is the default option and hit Enter.

Step 18: Now, you should see “Boot” under the Flags as shown in the below picture.

Step 19: As we have made the disk bootable, we have to write these settings to the partition. So, choose Write by navigating with the keys and hit Enter.

Step 20: Now, last step is to confirm and to create a new partition. Type “yes” and hit Enter.

Step 21: Now, navigate to the Quit option in the menu and hit Enter.

Step 22: Its time to select our created partition from the menu and hit enter.

Step 23: Now, select the filesystem for the created partition. Choose ext3 and hit Enter. You can even choose other options too if you need.

Step 24: Select “yes” from the menu and hit enter to confirm that you want to choose ext3 and format the partition. 
Step 25: Now, choose “Yes” to install GRUB boot loader and hit “Enter”.

Step 26: Choose “Yes” to install EFI GRUB2 and hit Enter.

Step 27: Select “Yes” and hit Enter to confirm the format of boot partition.

Step 28: Choose “Yes” to install the /system directory and hit Enter.

Step 29: You should see the installation progress bar like the following:

Step 30: You should see the Congratulations screen. Choose “Run Android-X86“.

Now, you should see the Android booting up and the “ANDROID” splash screen. Your mouse or trackpad can be used to navigate through the whole user interface. The following are the screens after the android has been booted up on the machine. You have to also, enter your google email id and go through the step by step process of setting up your device.


ENJOY 😀
-SH